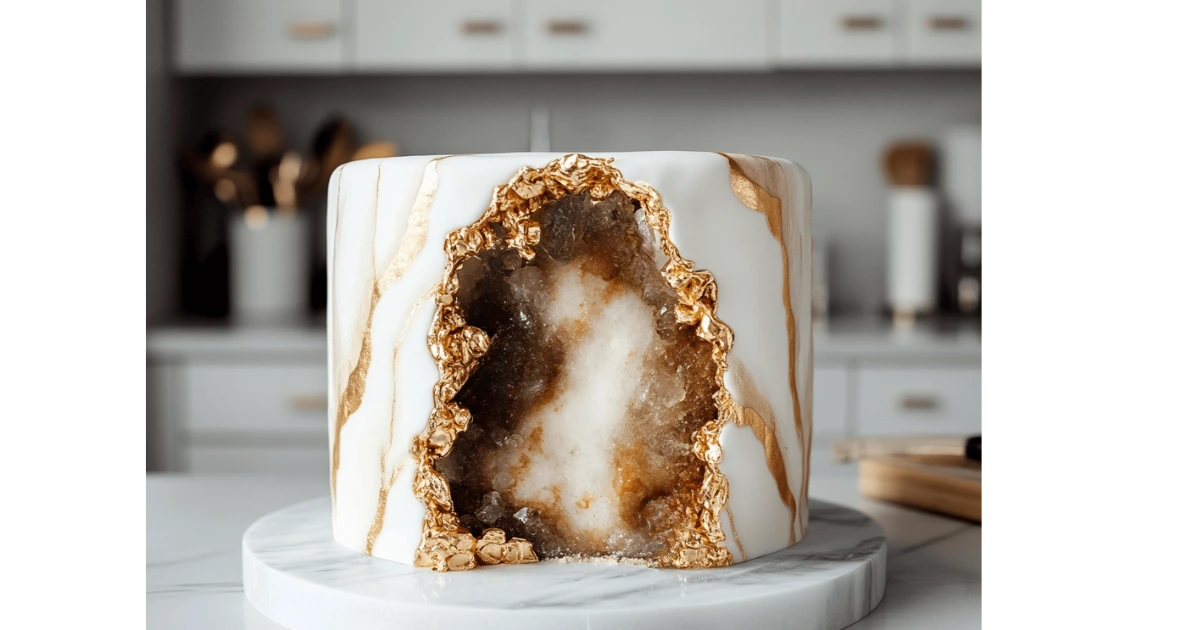
The Beauty of Geode Cakes
Why geode cakes are a showstopper and trending in celebrations.
Geode cakes are more than just desserts; they’re breathtaking works of edible art. These cakes replicate the mesmerizing natural beauty of geodes—crystal-filled rock formations that dazzle with their intricate patterns and vibrant colors. From shimmering sugar crystals to metallic-painted fondant, geode cakes are designed to captivate and impress at first glance.
Perfect for weddings, birthdays, and even corporate events, geode cakes add a touch of elegance and wonder to any celebration. Whether it’s a minimalist monochrome design or a bold burst of color, these cakes have a unique versatility that makes them a favorite among cake enthusiasts and event planners alike.
Why Geode Cakes Are Trending
In recent years, geode cakes have taken the baking world by storm and become a standout trend across social media platforms. Instagram and Pinterest are filled with stunning examples, showcasing intricate designs that blur the line between dessert and fine art.
The popularity of geode cakes can be attributed to their ability to transform a simple cake into a dazzling centerpiece. They offer bakers an opportunity to experiment with bold designs and creative techniques, making each geode cake a one-of-a-kind masterpiece. This trend combines innovation, beauty, and craftsmanship, earning its place as one of the most sought-after cake designs.
What You’ll Learn in This Tutorial
Creating a geode cake might seem daunting at first, but with the proper guidance, anyone can master this artistic design. In this comprehensive tutorial, we’ll walk you through the entire process, from baking the perfect cake base to crafting realistic sugar crystals and applying the finishing touches.
You’ll learn:
- These are the essential tools and ingredients needed for a flawless geode cake.
- Step-by-step techniques for carving, decorating, and painting.
- Troubleshooting common challenges to ensure a stunning final result.
By the end of this guide, you’ll have all the knowledge and confidence to create your own geode cake—a dessert that’s as delicious as it is dazzling.
Table of Contents
What Is a Geode Cake?
A geode cake is a dessert designed to resemble a natural geode—a hollow rock formation lined with sparkling crystals. These cakes are an exquisite fusion of baking and artistry, featuring edible crystals made from sugar or candy that mimic the intricate formations found in nature. The design typically includes a carved section in the cake’s exterior, revealing a stunning crystalline interior accented with metallic colors like gold or silver for added realism.
Geode cakes are not just about aesthetics; they also showcase the baker’s skill and creativity. Whether simple or extravagant, they transform an ordinary cake into a spectacular centerpiece for any event.
The Rise of Geode Cakes: A Brief History
The geode cake trend emerged in 2016 when a cake artist first showcased the concept on social media, sparking global admiration. Since then, these cakes have become a symbol of modern baking innovation. Bakers around the world have embraced the challenge of replicating nature’s beauty in edible form, and geode cakes now feature prominently in weddings, birthdays, and luxury events.
Their popularity continues to grow, fueled by the demand for visually stunning desserts that double as artistic statements.
Key Elements of a Geode Cake
Creating a geode cake involves a combination of technical skills and creative flair. The three main elements are:
- Cake Base: Typically a layered sponge cake that serves as the foundation.
- Edible Crystals: Made from sugar, isomalt, or rock candy, these crystals form the “geode” effect.
- Fondant and Decorations: Fondant is used to cover the cake and create a smooth exterior. Edible paints and metallic powders are applied to enhance the realism of the design.
The beauty of a geode cake lies in its versatility—you can experiment with different colors, crystal sizes, and designs to match any theme or occasion.
Tools and Ingredients Needed
Creating a stunning geode cake requires the right tools and high-quality ingredients. In this chapter, we’ll break down everything you need to get started, ensuring you’re fully prepared for the creative process ahead.
Essential Tools for a Geode Cake
Here’s a list of tools you’ll need and how they contribute to the process:
- Cake Pans: Round or square pans are used to bake the cake layers. Ensure they’re the same size for even stacking.
- Offset Spatula and Bench Scraper: This is for smooth frosting and fondant application.
- Fondant Tools: Rolling pin, smoothing tools, and modeling tools for creating details.
- Edible Paintbrushes: Used to apply metallic edible paints or dust to the crystals and fondant.
- Sharp Knife or Cake Carving Tools: To create the carved section for the geode effect.
- Piping Bags and Tips: For applying frosting between cake layers and for detailing.
- Kitchen Torch (Optional): Useful for melting and shaping isomalt crystals.
- Measuring Cups and Spoons: To ensure precise measurements of ingredients.
Having these tools on hand will streamline the process and help you achieve professional-looking results.
Key Ingredients for the Cake Base
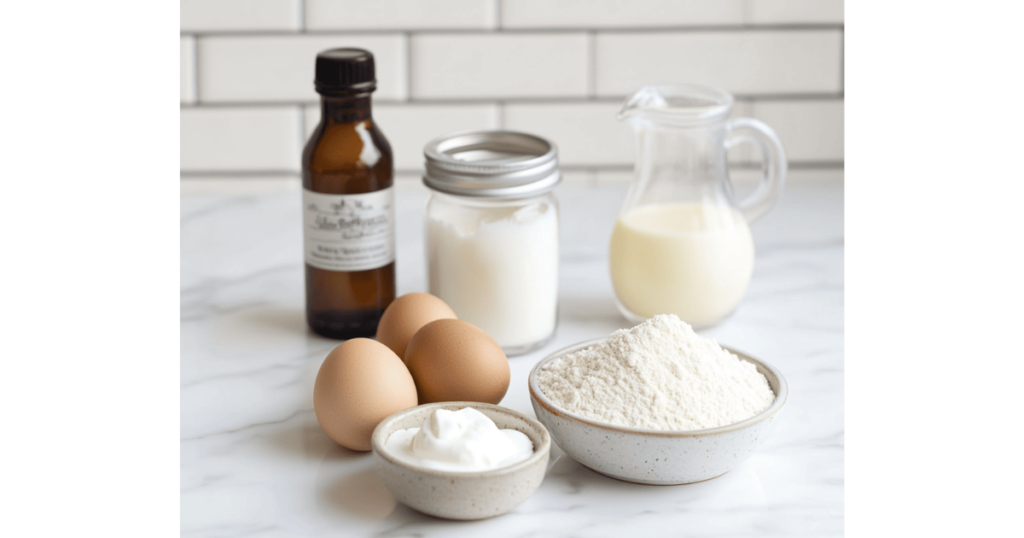
For the base of your geode cake, you’ll need:
- Cake Flour (3 cups): Ensures a soft, fluffy texture.
- Granulated Sugar (2 cups): For sweetness and structure.
- Eggs (4 large): Adds richness and stability.
- Unsalted Butter (1 cup): Provides moisture and flavor.
- Milk (1 cup): Helps create a smooth batter.
- Vanilla Extract (2 tsp): For a classic flavor.
- Baking Powder (2 tsp) and Salt (1/2 tsp): For proper rise and balance.
These quantities will yield a 3-layer, 8-inch round cake, which serves approximately 10–12 people, depending on the size of the slices.
Ingredients for the Geode Effect
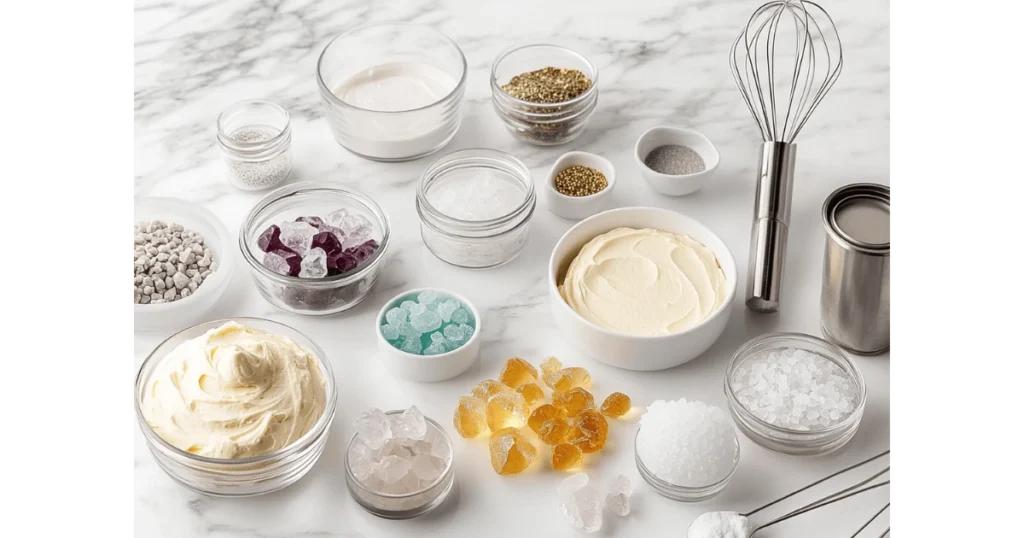
The geode section is the highlight of the cake. You’ll need:
- Rock Candy or Isomalt Crystals (2–3 cups): The edible crystals for the geode effect. Choose colors like clear, amethyst, or turquoise, depending on your design.
- Fondant (2 lbs): Used to cover the cake and create a smooth base for painting.
- Edible Metallic Paints (Gold, Silver, Copper): For detailing the edges of the geode.
- Gel Food Coloring: For coloring fondant or shading the crystals.
- Buttercream Frosting (3–4 cups): Acts as a crumb coat and adhesive for the fondant.
These quantities are enough to decorate a 3-layer cake.
Substitutes and Alternatives
Don’t have all the ingredients? Here are some alternatives:
- Rock Candy Substitute: Use crushed hard candies or make your own crystals with sugar and water.
- Isomalt Crystals Alternative: Use transparent gelatin sheets, though they won’t have the same sparkle.
- Fondant Substitute: Use modeling chocolate for a slightly different texture and taste.
- Vegan or Gluten-Free Options: Substitute eggs with flaxseed and use gluten-free flour for dietary preferences.
Baking the Cake Base
A solid and delicious cake base is the foundation of any stunning geode cake. This chapter will guide you through baking a moist, sturdy cake that’s perfect for layering and decorating. Follow the steps carefully to ensure your cake is both tasty and structurally sound.
Preparing the Ingredients and Tools
Before starting, gather your tools and ingredients to make the process seamless:
- Preheat your oven to 350°F (175°C).
- Grease and line three 8-inch round cake pans with parchment paper to prevent sticking.
- Measure all ingredients accurately using measuring cups and spoons for consistency.
Pro Tip: Use room-temperature ingredients (butter, eggs, and milk) for a smoother batter and better baking results.
Mixing the Batter
- Cream the Butter and Sugar: In a large mixing bowl, beat 1 cup of unsalted butter and 2 cups of granulated sugar with a hand or stand mixer until light and fluffy (about 3–5 minutes).
- Add the Eggs: Mix in 4 large eggs one at a time, ensuring each is fully incorporated before adding the next.
- Combine the Dry Ingredients: In a separate bowl, sift together 3 cups of cake flour, 2 tsp of baking powder, and 1/2 tsp of salt.
- Alternate Wet and Dry Ingredients: Gradually add the dry ingredients to the butter mixture, alternating with 1 cup of milk (starting and ending with the dry ingredients). Add 2 tsp of vanilla extract for flavor.
- Mix Until Smooth: Avoid overmixing, as it can make the cake dense. Stop mixing once the batter is smooth and lump-free.
Baking the Cake Layers
- Divide the Batter Evenly: Pour the batter into the prepared pans, smoothing the tops with a spatula. Each pan should hold an equal amount of batter for even layers.
- Bake: Place the pans in the preheated oven and bake for 25–30 minutes, or until a toothpick inserted into the center comes out clean.
- Cool the Cakes: Let the cakes cool in their pans for 10 minutes before transferring them to a wire rack to cool completely.
Pro Tip: Cool the cakes thoroughly before decorating to prevent the frosting and fondant from melting.
Storing and Preparing for Decoration
- Once cooled, level the cake layers using a serrated knife or cake leveler to create an even surface for stacking.
- Wrap each layer in plastic wrap and refrigerate for at least 1 hour or overnight. Chilled cakes are easier to handle during the decoration process.
If you’re short on time, place the wrapped layers in the freezer for 30 minutes to firm them up quickly.
Preparing the Geode Design Materials
Creating the geode effect is where the magic happens, and the materials you use play a significant role in bringing your design to life. In this chapter, we’ll go over how to prepare the edible crystals, fondant, and colors that will transform your cake into a stunning geode masterpiece.
Crystals: How to Create Edible Crystals Using Sugar or Isomalt
To achieve the dazzling crystal effect on your geode cake, you’ll need to create edible crystals. Here’s how:
- Using Sugar:
- Heat the Sugar: In a saucepan, combine sugar with water and a small amount of corn syrup (optional). Heat the mixture over medium heat until it reaches a clear, boiling state.
- Cool and Break: Allow the syrup to cool slightly, then pour it onto a silicone mat or parchment paper. Once it’s cool and firm, break it into crystal-like pieces.
- Optional Color: Add food coloring or edible glitter to the syrup before it hardens to create vibrant, multicolored crystals.
- Using Isomalt:
- Melt the Isomalt: Isomalt crystals can be melted in a microwave or over a double boiler. Heat it gently until it turns clear and bubbly.
- Cool and Mold: Once melted, pour the isomalt onto a silicone baking mat or a mold. Allow it to cool and harden before breaking it into various sizes to mimic natural crystals.
- Add Color (Optional): Isomalt can be tinted with gel food coloring during the melting process for a more dramatic look.
- Alternative: Pre-made Rock Candy If creating sugar or isomalt crystals feels too challenging or time-consuming, pre-made rock candy can be a quick and easy alternative. You can find it in various colors and shapes, which will still provide that eye-catching sparkle when applied to your cake.
Fondant: How to Color and Marble Fondant for a Realistic Stone Effect
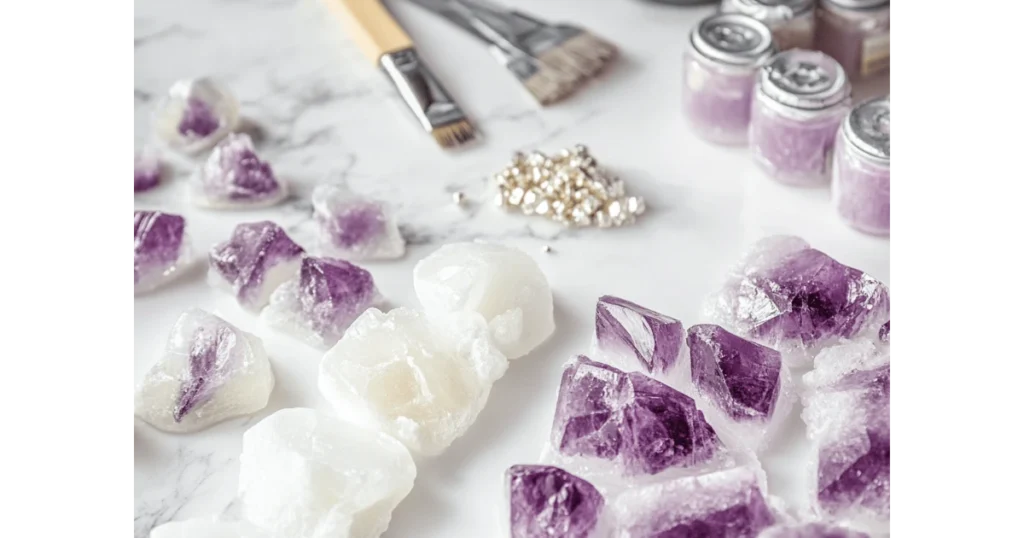
Fondant provides a smooth base to cover your cake and a great medium for creating realistic geode-like effects. Here’s how to work with fondant:
- Coloring Fondant:
- Add Gel Food Coloring: To color fondant, use gel food coloring (as it doesn’t affect the consistency). Add a small amount and knead until the color is evenly distributed.
- Make a Marble Effect: For a stone-like marbled effect, take several colors of fondant (such as gray, white, or beige) and roll them into small logs. Twist and knead the logs together gently to create a marbled effect. Don’t overwork it—this ensures the marbling looks natural.
- Rolling and Applying Fondant:
- Roll to Desired Thickness: Roll out your fondant on a clean surface, using cornstarch or powdered sugar to prevent sticking. Aim for a thickness of about 1/8 inch.
- Apply Smoothly: Drape the rolled fondant over the cake, smoothing it gently with your hands and a fondant smoother to remove any air bubbles or wrinkles.
- Trim Excess: Cut off any excess fondant around the base of the cake using a sharp knife.
Edible Paints and Colors: How to Mix Edible Metallic Paints for a Polished Look
For a polished and realistic geode effect, metallic paints are essential to add depth and shine to your geode crystals and fondant.
- Mixing Edible Paints:
- Choose Your Paints: Opt for edible metallic paints in colors like gold, silver, or copper. You can use pre-mixed edible paints or mix your own by adding gold or silver luster dust to a small amount of clear alcohol (such as lemon extract, which evaporates quickly).
- Mix to a Paste: If using luster dust, add a few drops of clear alcohol or water to create a smooth, paintable paste.
- Test the Paint: Before applying the metallic paint to your cake, test it on a piece of scrap fondant to make sure the color and consistency are what you desire.
- Applying the Metallic Paint:
- Brush the Paint on Edges: Use a fine-tipped edible paintbrush to apply the metallic paint to the edges of your geode and fondant, enhancing the natural crystal effect.
- Gradual Application: For added depth, gradually build up layers of paint. Start with a light coat, let it dry, and then add more paint to create dimension.
- Shading: Lightly paint around the edges of your geode crystals for a shaded effect, which will make the crystals look more lifelike.
Carving and Assembling the Cake
Now that your cake layers are baked and cooled, it’s time to shape and stack them. This chapter will guide you through carving the geode section and assembling the layers to create a sturdy base for decoration.
Stacking the Cake Layers
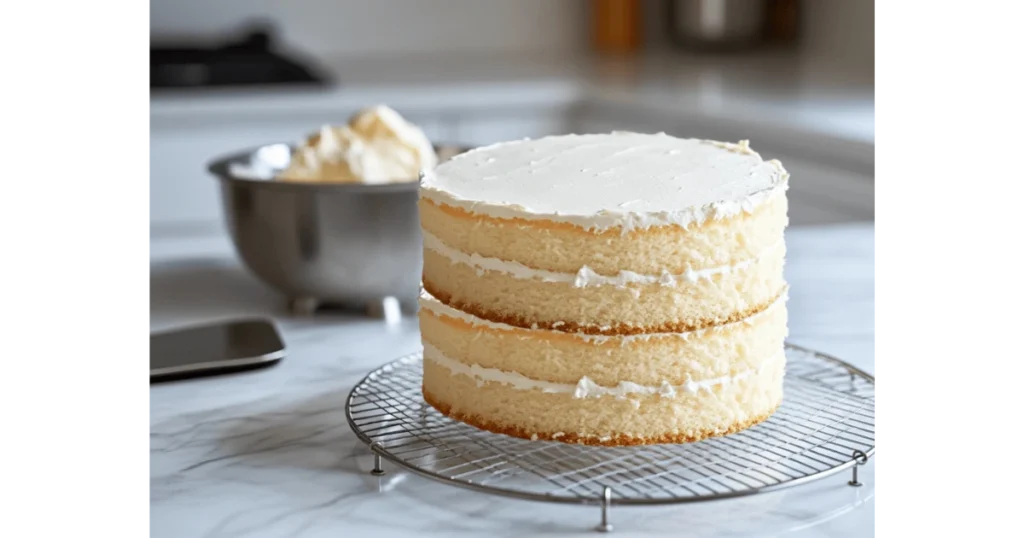
- Prepare the Layers: Remove the chilled cake layers from the refrigerator or freezer. Unwrap them and ensure they are level using a serrated knife or cake leveler.
- Apply the Buttercream: Using an offset spatula, spread a thin layer of buttercream frosting (about 1/4 cup) on top of the first cake layer. Place the second layer on top and repeat the process. Add the third layer and ensure they are aligned.
- Crumb Coat: Apply a thin layer of buttercream frosting over the entire cake. This crumb coat helps seal in crumbs and creates a smooth surface for the fondant. Use a bench scraper to smooth the frosting.
- Chill the Cake: Place the cake in the refrigerator for 30 minutes to firm up the crumb coat.
Carving the Geode Section
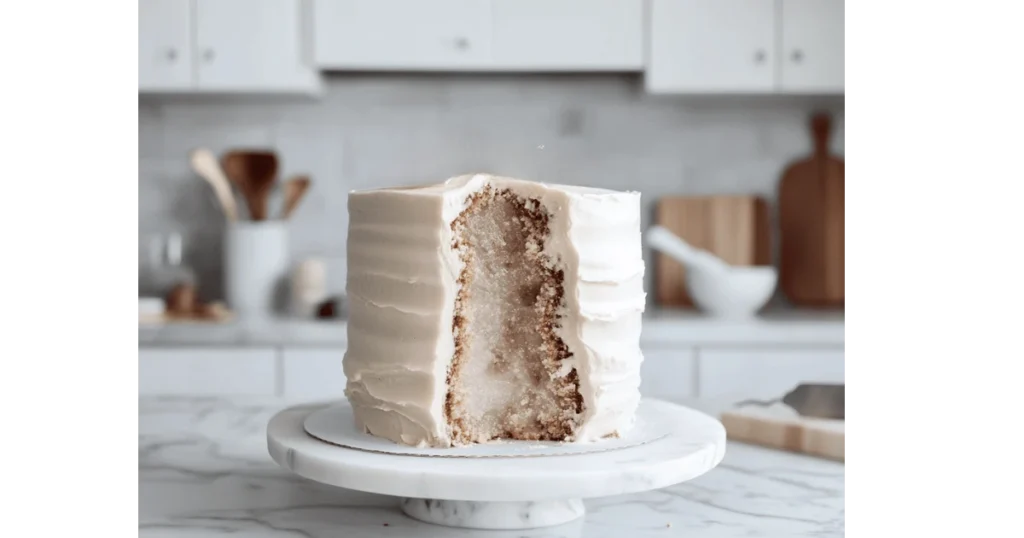
- Mark the Geode Area: Outline the area where the geode effect will be carved using a toothpick or the tip of a knife. Choose a design that’s either a vertical slice or an asymmetrical shape for a natural look.
- Carve the Cake: Carefully cut into the outlined section with a sharp knife, removing small pieces of cake to create a shallow cavity. The depth of the cavity should be approximately 1–2 inches, depending on your desired effect.
- Shape the Edges: Smooth and refine the edges of the carved section to mimic the natural contours of a geode.
Pro Tip: Save the removed cake pieces to make cake pops or for snacking!
Preparing the Base for Decoration
- Fill the Cavity: Apply a thin layer of buttercream frosting inside the carved cavity. This will act as an adhesive for the rock candy or isomalt crystals.
- Cover the Cake with Fondant: Roll out the fondant to about 1/8 inch thickness and drape it over the entire cake. Use fondant smoothers to eliminate wrinkles and bubbles. Trim the excess fondant at the base of the cake with a sharp knife.
- Cut Out the Geode Section: Gently cut and remove the fondant covering the carved cavity to expose the buttercream-coated area. Smooth the edges of the fondant around the cavity for a polished finish.
Stabilizing the Cake
- Insert dowels or straws into the cake if it feels unstable, especially if your cake has multiple tiers.
- Place the cake on a sturdy base or cake board to support the weight during decoration and transportation.
Decorating the Geode Cake
Creating the Geode Effect
The geode effect is the centerpiece of your cake, so it’s essential to get it right. Here’s how you can create a realistic and stunning geode effect:
- Apply Edible Crystals:
- Carefully place the edible crystals (rock candy or isomalt) into the carved geode section.
- Start with the larger crystals on the outer edges and gradually add smaller ones toward the center for depth.
- Make sure to leave gaps between the crystals to give a more natural, random appearance.
- Building Depth:
- Layer the crystals to create the illusion of depth within the geode.
- Use different colors or shades to enhance the effect—for example, clear and light-colored crystals for a sparkling interior or darker hues for a more dramatic look.
- Secure the Crystals:
- Lightly press the crystals into the buttercream to ensure they stay in place.
- You can also use a small amount of melted isomalt or clear syrup to “glue” the crystals together.
Detailing the Fondant
Once the crystals are in place, it’s time to focus on the fondant and final touches to make the geode effect pop:
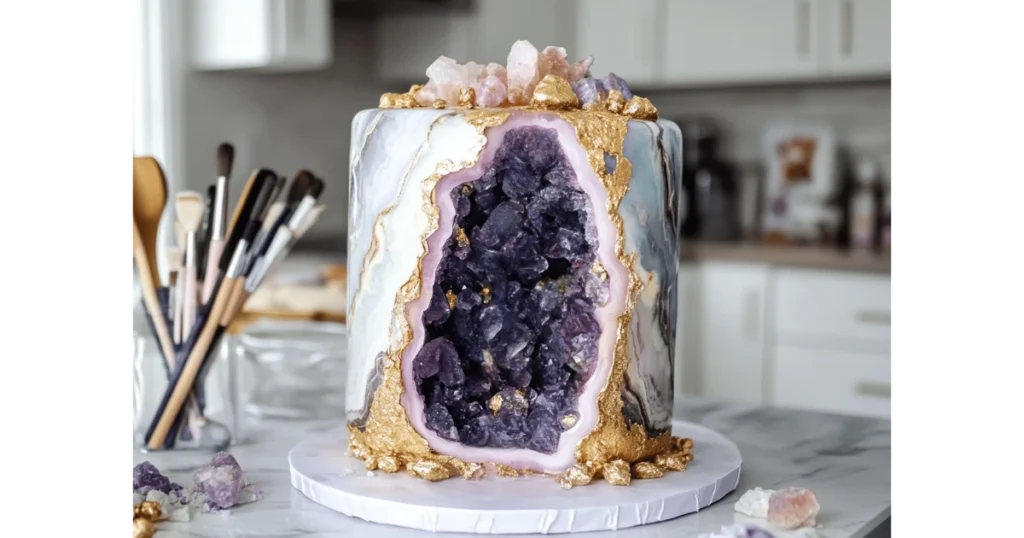
- Paint the Edges with Metallic Edible Paints:
- Paint the edges of the carved geode with edible metallic paints (gold, silver, or copper).
- This will give your cake a luxurious, polished look, mimicking the way real geodes sparkle.
- Shading for Realism:
- To add more realism, gently shade the fondant around the geode with darker edible colors (like black, brown, or deep blue).
- Blend the colors subtly to give the impression of depth and dimension.
- Adding Highlights:
- Lightly brush some edible glitter or shimmer dust over the edges for a sparkling effect.
- This will catch the light and create a stunning visual contrast against the fondant and crystals.
Common Mistakes and How to Avoid Them
Overloading the Cake with Crystals
- Mistake: Sometimes, bakers go overboard with crystals, making the geode effect look too crowded or unnatural.
- How to Avoid It:
- Keep the crystals balanced, allowing for some space between them to enhance the depth and realism.
- Focus on a few larger crystals near the edges and fill in with smaller ones toward the center.
Uneven Fondant Application
- Mistake: Applying fondant can cause wrinkles, bubbles, or cracks, which will take away from the smooth, polished look.
- How to Avoid It:
- Roll the fondant to an even thickness (about 1/8 inch).
- Apply it slowly and gently, smoothing out any air bubbles with a fondant smoother.
- Trim the excess fondant carefully, ensuring a clean edge around the base of the cake.
Carving Mistakes
- Mistake: Improperly carving the cake can lead to uneven or unnatural geode shapes.
- How to Avoid It:
- Use a sharp knife and carve slowly to ensure clean, smooth edges.
- If you make a mistake, it’s okay to fill in the gaps with additional frosting or fondant and re-carve.
Crystals Not Staying in Place
- Mistake: Crystals sliding off the cake or falling out of place is a common issue.
- How to Avoid It:
- Use a sturdy buttercream or isomalt base to adhere to the crystals.
- Press the crystals gently into the frosting to secure them firmly.
- You can also refrigerate the cake briefly to firm up the frosting before adding the crystals.
Storage and Presentation Tips
How to Store Your Geode Cake
Storing your geode cake is essential to maintaining its beauty and freshness. Here are some tips to keep it looking its best:
- Room Temperature: If you plan to serve the cake within a day or two, store it in a cool, dry place at room temperature. Make sure it’s covered loosely with plastic wrap to protect the fondant and prevent it from drying out.
- Refrigeration: If you need to store the cake for longer, refrigerate it. However, refrigeration can sometimes cause the fondant to become sticky. To avoid this, place the cake in a large box or cover it loosely with plastic wrap.
- Freezing: Geode cakes can also be frozen. To do so, wrap the entire cake tightly in plastic wrap, followed by aluminum foil. Let it thaw at room temperature before serving to maintain the best texture.
Best Ways to Present Your Geode Cake
Presentation is everything when it comes to a stunning geode cake. Here are some presentation tips that will make your cake the star of the show:
- Use a Sturdy Cake Board: A sturdy base is crucial to support the weight of the cake, especially if you have heavy crystals or multiple tiers. A thick, decorative cake board will also add a nice finishing touch.
- Display on a Cake Stand: Elevating the cake on a beautiful cake stand can enhance its visual impact. Choose a stand that complements your cake design—whether it’s sleek and modern or ornate and vintage.
- Lighting Matters: Lighting can make a huge difference in how your geode cake is perceived. Display your cake in a well-lit area, and consider using soft lighting to highlight the crystals and metallic details. Avoid direct sunlight, which can cause the cake to melt or dry out.
- Decorative Accents: You can complement your geode cake with additional decorative elements like fresh flowers, edible gold leaf, or even a glittery backdrop. These small details will enhance the overall presentation and make your cake feel even more special.
Final Touches Before Serving
- Avoid Touching the Crystals: To keep your crystals looking fresh, avoid touching them with your hands as much as possible. This will prevent smudging and ensure they maintain their sparkle.
- Slice with Care: When cutting the cake, be gentle to avoid disturbing the geode effect. Use a sharp knife to make clean cuts, and try to cut through the crystals carefully to preserve the design.
Different Color Schemes and Crystal Shapes
One of the great things about geode cakes is that they offer endless customization options. You can adjust the color scheme and crystal shapes to suit any occasion or theme.
- Color Schemes:
- Geode cakes typically use shades of blue, purple, pink, or green, but you can experiment with different hues. Consider incorporating metallics like gold, silver, or rose gold for a more luxurious feel.
- For a minimalist look, you can stick with monochrome colors, such as all-white with silver crystals or soft pastels, for a more delicate design.
- Use bright colors for fun occasions like birthday parties or a bold wedding design with jewel tones like ruby red, emerald green, and sapphire blue.
- Crystal Shapes:
- The crystals in your geode cake can come in various shapes. While jagged crystals are common, you can try more rounded or delicate shapes for a softer, more organic look.
- Consider creating crystals with different sizes to give your cake more depth and a more natural geode appearance.
- You can also mix multiple crystal shapes in a single design to add contrast and texture.
Adapting the Geode Design for Cupcakes or Mini Cakes
If you love the look of a geode cake but want to scale it down, there are easy ways to create mini versions that still have the same wow factor.
- Cupcakes:
- Start with a simple frosted cupcake and decorate the top with tiny edible crystals, which can be made using sugar or candy.
- You can use a piping bag to create a soft buttercream swirl, then apply your geode crystals on top for a dramatic effect.
- For a unique twist, make the geode decorations in cupcake-sized clusters, arranging them into smaller, more intricate patterns.
- Mini Cakes:
- If you’re making mini cakes (such as 4-inch cakes), the process is similar to the larger cakes but on a smaller scale.
- Use the same frosting techniques to cover the cakes, then create a geode design by arranging the crystals in the center or along the sides.
- Mini cakes are perfect for personal events, and customizing the color scheme for each cake makes them ideal for weddings, parties, or celebrations where you want to match the theme.
Using Non-Traditional Cake Flavors or Fillings
While traditional geode cakes are often made with classic flavors like vanilla or chocolate, don’t be afraid to get creative with non-traditional flavors.
- Cake Flavors:
- Try using unique flavors such as lemon, coconut, or lavender for a fresh twist. These flavors can provide a nice contrast to the sweetness of the frosting and sugar crystals.
- For a more decadent option, opt for rich flavors like salted caramel, red velvet, or even a spiced chai cake for fall-themed geodes.
- Don’t be afraid to mix flavors, like pairing a chocolate cake with raspberry filling or lemon cake with vanilla buttercream.
- Fillings:
- Go beyond the typical buttercream filling and experiment with fruit preserves, cream cheese fillings, or even chocolate ganache for a different texture and taste.
- Consider adding layers of fruit, such as fresh berries, between the cake layers to complement the sweetness of the frosting and provide an unexpected burst of flavor.
- For a more indulgent treat, you could even try fillings like caramel, ganache, or mousse.
Final Thoughts and Inspiration
Recap of the Process and Key Takeaways
Creating a stunning geode cake is a rewarding experience that combines creativity, technique, and a little patience. From baking the perfect cake layers to carefully assembling the geode design, you’ve learned the essentials of making this show-stopping treat. Here are the key takeaways:
- Baking the Cake: Start with a solid foundation—whether it’s a classic flavor or something unique, make sure your cake layers are moist and well-balanced.
- Frosting and Filling: A smooth, even layer of buttercream or ganache is essential for a sleek surface to showcase your geode design.
- Geode Design: Using rock candy, edible crystals, or sugar shards, you can create beautiful geodes in various colors and shapes to reflect your personal style or the theme of your event.
- Personalization: From color schemes to flavor combinations, the beauty of geode cakes lies in their versatility. Don’t be afraid to experiment and make the design your own.
Encouragement to Try Your Own Geode Cake Creations
Now that you’ve learned the steps, it’s time to get creative and bring your vision to life! Whether it’s for a special occasion, a party, or just for fun, a geode cake is sure to impress. Don’t be intimidated—take your time and enjoy the process. The more you practice, the more you’ll refine your technique and make the geodes even more stunning.
Call to Action: Share Your Creations and Tag Us for a Feature!
We’d love to see your geode cake creations! Share your cake photos on social media and tag us to have a chance to be featured. Your beautiful designs can inspire others to take the plunge and try their own geode cakes. Remember, there’s no right or wrong way to make a geode cake—just let your creativity flow!
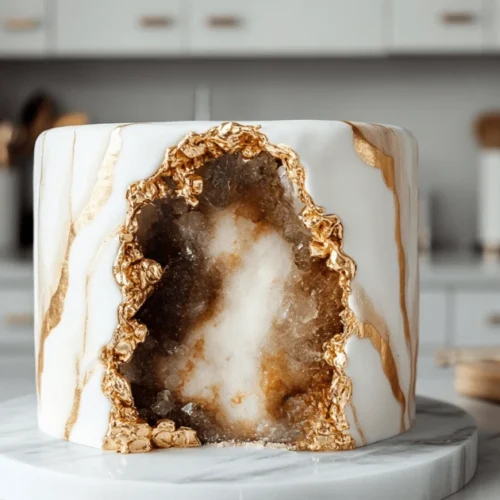
Ultimate Geode Cake Tutorial
Ingredients
Cake Base
- 2 ½ cups all-purpose flour
- 2 ½ tsp baking powder
- ½ tsp salt
- 1 cup unsalted butter softened
- 2 cups granulated sugar
- 4 large eggs
- 1 ½ tsp vanilla extract
- 1 cup whole milk
Buttercream Frosting
- 1 cup unsalted butter softened
- 4 cups powdered sugar
- 2 tbsp heavy cream
- 1 tsp vanilla extract
Geode Decorations
- 1 lb isomalt or pre-made rock candy assorted colors
- Edible metallic paints gold, silver, etc.
- Gel food coloring optional
Fondant
- 1 lb white fondant
- Gel food coloring for marbling
Instructions
Prepare the Cake Batter:
- Preheat the oven to 350°F (175°C). Grease and line two 8-inch cake pans.
- In a bowl, whisk together flour, baking powder, and salt.
- In a separate bowl, cream butter and sugar until light and fluffy.
- Beat in eggs one at a time, then add vanilla extract.
- Gradually add dry ingredients alternately with milk, mixing until combined.
- Pour batter into prepared pans and bake for 30-35 minutes or until a toothpick comes out clean.
- Let the cakes cool completely.
Make the Buttercream Frosting:
- Beat butter until creamy. Gradually add powdered sugar, mixing until smooth.
- Add heavy cream and vanilla, then beat for another 2-3 minutes until fluffy.
Prepare the Decorations:
- Melt isomalt according to package instructions and pour it onto a silicone mat to cool. Break into crystal-like shards once set.
- If using rock candy, sort crystals by color.
- Color fondant with gel food coloring to create a marbled stone effect.
Assemble the Cake:
- Level the cake layers if needed. Spread buttercream frosting between layers and stack them.
- Carve out a section of the cake to create a geode cavity. Frost the entire cake and chill for 30 minutes.
Apply Fondant and Crystals:
- Roll out the marbled fondant and cover the cake smoothly. Trim excess fondant.
- Apply edible crystals into the carved cavity, starting with darker colors inside and lighter colors outside.
- Paint the edges of the cavity with metallic edible paint for a polished look.
Finishing Touches:
- Add shading and highlights using food coloring or dusts.
- Present your cake on a decorative stand for maximum impact!
Notes
- Substitute rock candy with sugar crystals if isomalt is unavailable.
- Keep your workspace clean and dust-free for a polished finish.
- For a unique twist, try customizing the color palette of your crystals!

