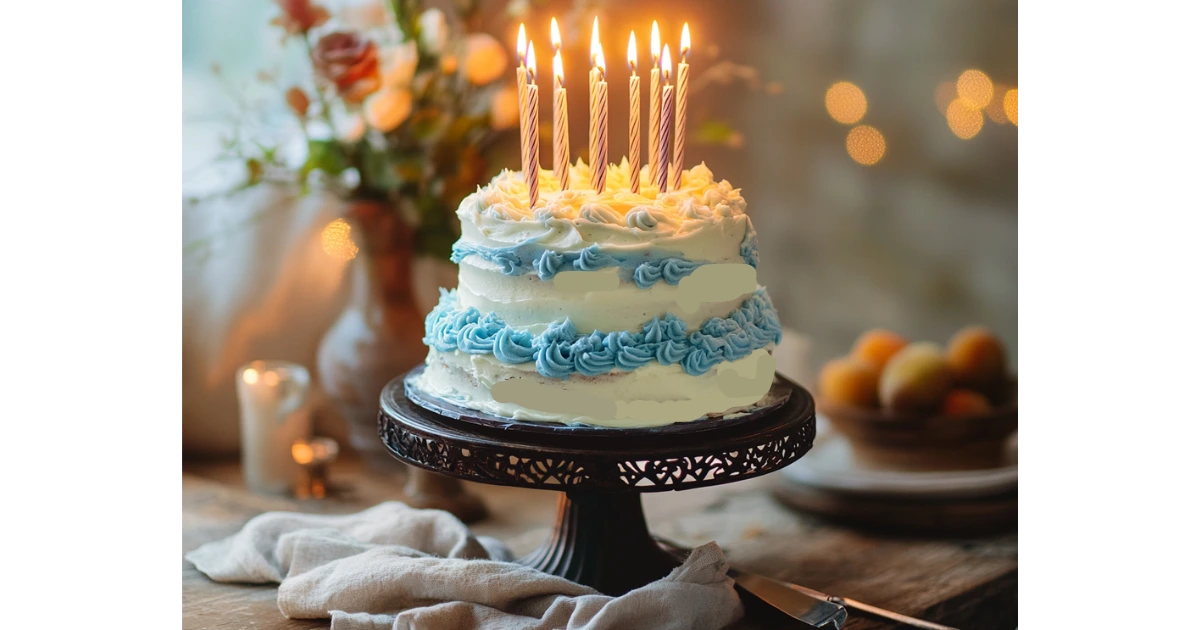
Introduction : The magic of Disney and fairy-tale desserts.
Table of Contents
A Cake That Brings Fairy-Tales to Life
There’s something truly magical about a cake that transports you to a world of enchantment. The Sleeping Beauty Cake does just that—it’s a stunning, Disney-inspired dessert that captures the essence of one of the most beloved fairy-tales of all time. Whether you’re planning a themed birthday party, a fairy-tale wedding, or simply want to indulge in a whimsical treat, this cake is sure to steal the show.
Inspired by a Timeless Classic
Inspired by Disney’s Sleeping Beauty, this cake brings the story of Princess Aurora, the three good fairies, and the iconic elements of the movie to life. From its vibrant colors to its intricate designs, the Sleeping Beauty Cake is more than just a dessert—it’s a centerpiece that sparks joy and wonder. Whether it’s the pink and blue hues of Aurora’s dress or the golden accents of the castle, every detail tells a story.
Perfect for Any Occasion
What makes this cake so special? For starters, it’s incredibly versatile. Whether you’re a baking enthusiast looking to create a masterpiece at home or someone who prefers to leave it to the professionals, there’s a Sleeping Beauty Cake for everyone. With customizable designs and a variety of flavors, it’s the perfect choice for:
- Birthday Parties: For kids and adults alike.
- Weddings and Anniversaries: Add a fairy-tale touch to your special day.
- Holiday Celebrations: Christmas, Easter, or even Halloween-themed variations.
What You’ll Learn in This Guide
In this blog post, we’ll take you on a journey through the world of Sleeping Beauty Cake. Here’s what you’ll discover:
- The history and inspiration behind this magical dessert.
- A step-by-step guide to making your own Sleeping Beauty Cake at home.
- Creative decorating ideas to bring your cake to life.
- Where to buy a professionally made cake if baking isn’t your thing.
- Answers to all your FAQs about this enchanting dessert.
Let’s Create Something Magical
So, whether you’re a Disney fan, a baking novice, or simply someone who loves a good cake, this guide is for you. Let’s dive into the enchanting world of Sleeping Beauty Cake and create a dessert that’s truly fit for a princess. Ready to get started? Let’s bake some magic!
The History and Inspiration Behind Sleeping Beauty Cake
The Disney Connection: A Fairy-Tale Come to Life
The Sleeping Beauty Cake is more than just a dessert—it’s a tribute to one of Disney’s most iconic films, Sleeping Beauty. Released in 1959, the movie tells the story of Princess Aurora, cursed by the evil Maleficent and saved by true love’s kiss. The film’s stunning animation, memorable characters, and timeless themes have made it a classic, inspiring everything from merchandise to themed desserts like this cake.
Iconic Elements That Inspire the Cake
The design of the Sleeping Beauty Cake draws heavily from the movie’s most recognizable elements:
- Princess Aurora: Her pink and blue dresses are often recreated in fondant or buttercream.
- The Three Good Fairies: Flora, Fauna, and Merryweather’s vibrant colors and magical touches are popular decorative themes.
- The Castle: King Stefan’s castle, with its golden spires, is a common centerpiece for the cake.
- The Spinning Wheel: A nod to the movie’s pivotal moment, this element adds a dramatic touch.
The Rise of Disney-Themed Desserts
Disney-themed cakes have become a global phenomenon, and the Sleeping Beauty Cake is no exception. From birthday parties to weddings, these desserts allow fans to bring a piece of the magic into their celebrations. The cake’s popularity is a testament to the enduring appeal of Disney’s storytelling and its ability to inspire creativity in bakers and decorators alike.
Why Sleeping Beauty Stands Out
While there are many Disney-themed cakes, the Sleeping Beauty Cake holds a special place because of its:
- Elegant Aesthetic: The soft pinks, blues, and golds create a visually stunning design.
- Nostalgic Appeal: For many, Sleeping Beauty is a cherished childhood memory.
- Versatility: The cake can be adapted for various occasions, from kids’ parties to sophisticated weddings.
A Dessert That Tells a Story
Every Sleeping Beauty Cake is more than just a treat—it’s a way to relive the magic of the fairy-tale. Whether it’s through intricate fondant details or a simple yet elegant design, this cake captures the essence of the story and brings it to life in the most delicious way possible.
Why Choose a Sleeping Beauty Cake?
Perfect for Themed Parties
If you’re planning a Disney-themed event, the Sleeping Beauty Cake is a must-have. Whether it’s a child’s birthday party, a baby shower, or even an adult’s milestone celebration, this cake adds a touch of fairy-tale magic to any occasion. Its vibrant colors and intricate designs make it a showstopper that guests will remember for years to come.
Customizable Designs for Every Event
One of the best things about the Sleeping Beauty Cake is its versatility. You can tailor the design to suit your event’s theme or your personal preferences. For example:
- For Kids: Focus on Princess Aurora, the fairies, and the castle.
- For Weddings: Opt for a more elegant design with gold accents and subtle Disney touches.
- For Holidays: Add seasonal elements like Christmas trees or Easter eggs.
A Feast for the Eyes and the Taste Buds
The Sleeping Beauty Cake isn’t just about looks—it’s also delicious! Bakers can pair the stunning design with a variety of flavors, such as:
- Classic vanilla or chocolate.
- Rich red velvet or decadent caramel.
- Fruity options like strawberry or lemon.
No matter your preference, there’s a flavor combination that will satisfy your cravings.
Appeals to All Ages
While it’s a hit with kids, the Sleeping Beauty Cake also has a timeless appeal that adults love. Its elegant design and nostalgic connection to the Disney classic make it a favorite for all generations. Whether you’re 5 or 50, this cake brings out the inner child in everyone.
A Conversation Starter
Let’s face it—this cake is a work of art. From the intricate fondant details to the vibrant colors, the Sleeping Beauty Cake is guaranteed to be the center of attention at any event. It’s not just a dessert; it’s a conversation piece that will have everyone talking (and taking photos!).
Easy to Order or Make at Home
Whether you’re a baking pro or a beginner, the Sleeping Beauty Cake is accessible to everyone. You can:
- Order from a Bakery: Many bakeries specialize in custom Disney-themed cakes.
- DIY at Home: With the right tools and a bit of creativity, you can create your own masterpiece.
How to Make a Sleeping Beauty Cake: Step-by-Step Guide
Gather Your Ingredients
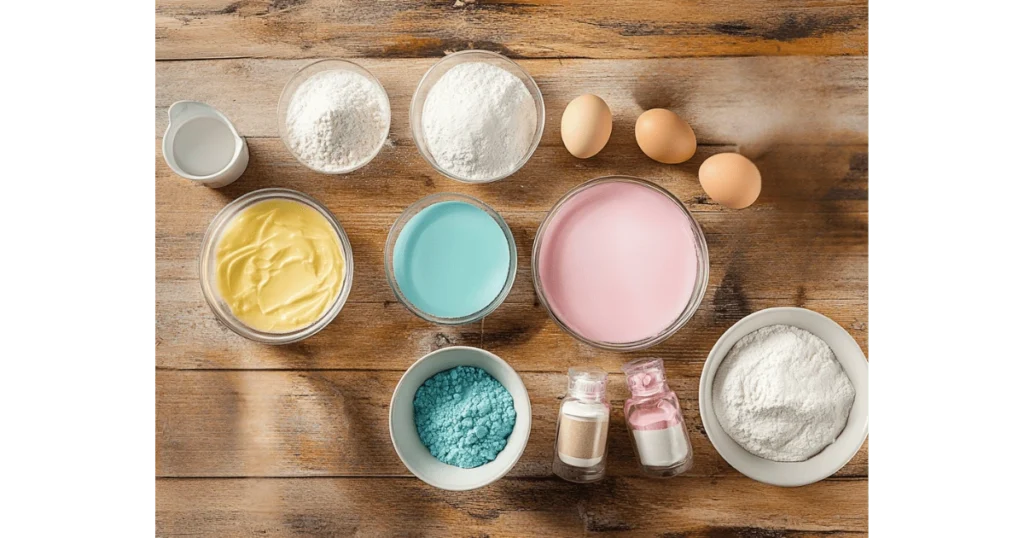
Before you start, make sure you have all the necessary ingredients. Here’s what you’ll need:
- For the Cake:
- 3 cups all-purpose flour
- 2 cups sugar
- 1 cup unsalted butter (softened)
- 4 large eggs
- 1 cup milk
- 2 tsp vanilla extract
- 1 tsp baking powder
- 1/2 tsp salt
- For the Frosting:
- 2 cups unsalted butter (softened)
- 4 cups powdered sugar
- 2 tsp vanilla extract
- 2-3 tbsp milk or heavy cream
- For Decorations:
- Fondant (pink, blue, gold, and other colors)
- Food coloring
- Edible glitter or gold dust
- Decorating tools (rolling pin, fondant cutters, brushes, etc.)
Bake the Cake Layers
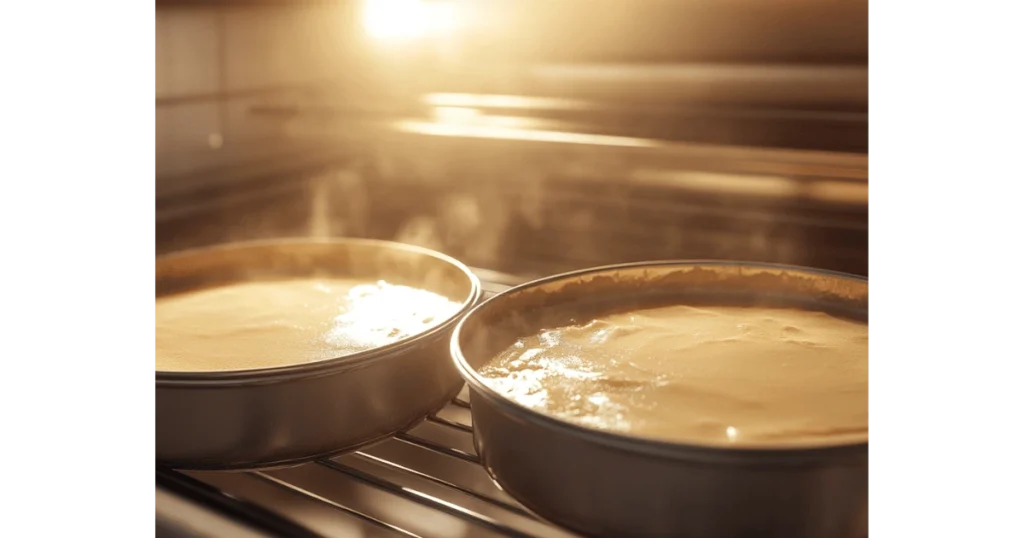
- Preheat the Oven: Set your oven to 350°F (175°C) and grease your cake pans.
- Prepare the Batter: In a large bowl, cream the butter and sugar until light and fluffy. Add the eggs one at a time, then mix in the vanilla. In a separate bowl, combine the dry ingredients (flour, baking powder, salt). Gradually add the dry ingredients to the wet mixture, alternating with milk.
- Bake: Pour the batter into the prepared pans and bake for 25-30 minutes, or until a toothpick inserted into the center comes out clean. Let the cakes cool completely before removing them from the pans.
Make the Frosting
- Cream the Butter: In a large bowl, beat the softened butter until smooth.
- Add Sugar and Vanilla: Gradually add the powdered sugar, mixing on low speed to avoid a mess. Once combined, add the vanilla and milk or cream. Beat on high speed until the frosting is light and fluffy.
Assemble the Cake
- Level the Layers: Use a serrated knife to level the tops of the cake layers if needed.
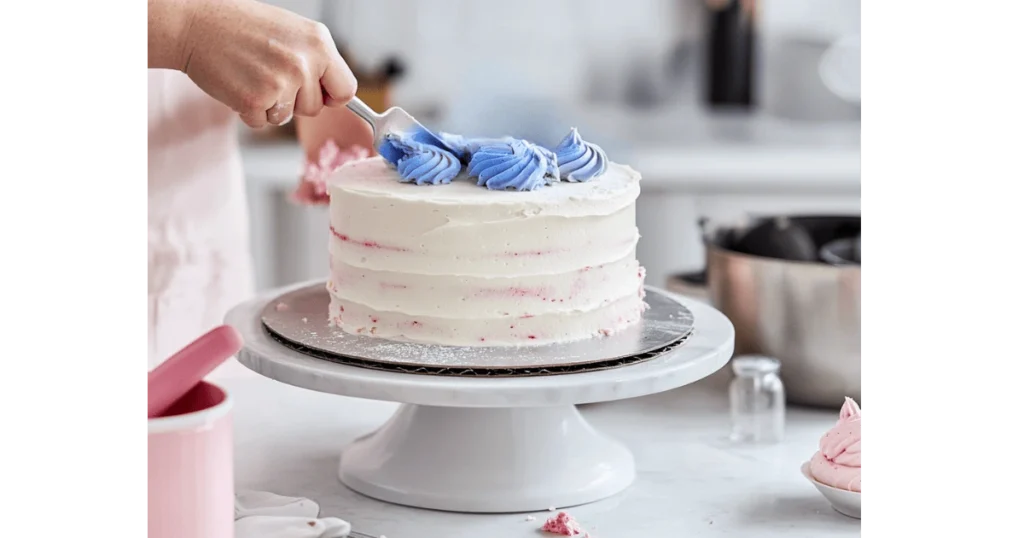
- Frost the Cake: Place the first layer on a cake stand or plate. Spread a layer of frosting on top, then add the second layer. Repeat until all layers are stacked. Apply a thin coat of frosting (crumb coat) to the entire cake and refrigerate for 15-20 minutes.
- Final Frosting: Apply a thicker layer of frosting to the cake, smoothing it out with a spatula or bench scraper.
Decorate the Cake
- Prepare Fondant: Roll out the fondant on a clean, lightly powdered surface. Use fondant cutters or a knife to create shapes like Princess Aurora’s dress, the castle, or the fairies.
- Add Details: Use food coloring to paint details or add edible glitter for a magical touch.
- Assemble Decorations: Carefully place the fondant pieces on the cake, using a bit of water or edible glue to secure them.
- Final Touches: Add gold accents, edible pearls, or other decorations to complete the design.
Alternative Options
- Gluten-Free: Use gluten-free flour instead of all-purpose flour.
- Vegan: Substitute butter with vegan margarine, eggs with flax eggs, and milk with almond or soy milk.
- Eggless: Use yogurt or applesauce as an egg replacement.
Decorating Ideas for Sleeping Beauty Cake
Classic Designs: Princess Aurora and the Castle
- Princess Aurora: Use pink and blue fondant to create Aurora’s iconic dress. Add details like her golden crown or flowing hair.
- The Castle: Build a miniature castle using fondant or edible paper. Add golden spires and tiny windows for a realistic touch.
- Combining Elements: Place Aurora figurines around the castle to recreate scenes from the movie.
Enchanted Forest Theme
- Trees and Flowers: Use green fondant to create trees and colorful flowers. Add edible glitter for a magical sparkle.
- Animals: Include fondant animals like deer, rabbits, or birds to bring the forest to life.
- Maleficent’s Thorny Vines: Use black fondant to create thorny vines wrapping around the cake for a dramatic effect.
Spinning Wheel Centerpiece
- Fondant Spinning Wheel: Create a spinning wheel using gray fondant and place it as the cake’s centerpiece.
- Dramatic Details: Add a tiny spindle and a touch of red food coloring to represent the cursed needle.
- Surrounding Decorations: Use pink and blue accents to balance the darker theme of the spinning wheel.
The Three Good Fairies
- Fondant Fairies: Create Flora, Fauna, and Merryweather using fondant in their signature colors (red, green, and blue).
- Magical Touches: Add edible glitter or shimmering dust to represent their magic.
- Placement: Position the fairies around the cake or on top as a topper.
Color Palette and Accents
- Pink and Blue: Use these colors to represent Aurora’s dress and the fairies’ magic.
- Gold Accents: Add golden details like edible pearls, glitter, or fondant shapes for a regal touch.
- Edible Glitter: Use glitter to create a magical, shimmering effect on the cake.
Creative Themes for Different Occasions
- Birthday Parties: Add candles, balloons, or a “Happy Birthday” message in fondant.
- Weddings: Use elegant designs with gold accents and subtle Disney touches.
- Holidays: Incorporate seasonal elements like Christmas trees, Easter eggs, or Halloween pumpkins.
Tips for Perfect Decorations
- Plan Ahead: Sketch your design before starting to ensure everything fits.
- Use Templates: Print out templates for fondant shapes like the castle or fairies.
- Practice: If you’re new to fondant, practice making shapes before decorating the cake.
- Keep It Simple: Don’t overwhelm the cake with too many details—focus on a few key elements.
Sleeping Beauty Cake for Different Occasions
Birthday Parties
- Kids’ Birthdays: Focus on fun designs like Princess Aurora, the fairies, or the castle. Add candles and a “Happy Birthday” message.
- Adult Birthdays: Opt for a more sophisticated design with elegant fondant details and gold accents.
- Themed Parties: Pair the cake with Disney decorations, costumes, and activities for a full fairy-tale experience.
Weddings and Anniversaries
- Fairy-Tale Weddings: Use the cake as a centerpiece, incorporating elements like the castle or golden spires.
- Anniversaries: Celebrate with a smaller version of the cake, featuring romantic details like fondant roses or hearts.
- Color Palette: Match the cake’s colors to your wedding or event theme for a cohesive look.
Baby Showers and Christenings
- Princess-Themed Showers: Use the cake to celebrate an upcoming “little princess.”
- Christenings: Incorporate soft pastel colors and subtle Disney touches for a sweet and elegant design.
- Personalized Details: Add the baby’s name or a special message to the cake.
Holiday Celebrations
- Christmas: Add festive elements like fondant snowflakes, Christmas trees, or a Santa hat on Princess Aurora.
- Easter: Decorate the cake with pastel colors, fondant eggs, or bunny figurines.
- Halloween: Create a spooky twist with Maleficent-inspired designs or black and purple accents.
Other Special Events
- Graduations: Celebrate with a cake featuring a fondant graduation cap or a “Congratulations” message.
- Retirement Parties: Use the cake to honor someone’s “happily ever after” after years of hard work.
- Disney-Themed Events: Perfect for Disney movie nights, fan gatherings, or charity events.
FAQs About Sleeping Beauty Cake
What Flavors Work Best for a Sleeping Beauty Cake?
- Classic Choices: Vanilla, chocolate, and red velvet are popular options.
- Fruity Flavors: Strawberry, lemon, or raspberry add a refreshing twist.
- Custom Options: Many bakeries allow you to choose unique flavors like caramel, cookies and cream, or even champagne for adult events.
How Much Does a Sleeping Beauty Cake Cost?
- Price Range: Depending on size and complexity, prices typically range from
- 50to
- 50to200 or more.
- Factors Affecting Cost: Custom designs, fondant decorations, and delivery fees can increase the price.
- Budget Tips: Opt for simpler designs or smaller sizes to save money.
Can I Make a Sleeping Beauty Cake at Home?
- Yes, You Can! With the right tools and a bit of practice, you can create a stunning cake at home.
- Tips for Beginners: Start with a simple design and use pre-made fondant or decorations.
- Resources: Look for online tutorials or baking classes to improve your skills.
How Do I Store and Transport the Cake?
- Storage: Keep the cake in a cool, dry place. If it has perishable fillings, refrigerate it and bring it to room temperature before serving.
- Transportation: Use a cake carrier or a sturdy box. Place non-slip mats under the cake to prevent sliding.
- Pro Tip: Assemble delicate decorations at the venue to avoid damage during transport.
How Far in Advance Should I Order or Bake the Cake?
- Ordering: For custom cakes, place your order at least 2-4 weeks in advance, especially during busy seasons.
- Baking at Home: Bake the cake layers 1-2 days before the event and decorate the day before.
- Last-Minute Options: Some bakeries offer ready-made designs for urgent orders.
Are There Allergy-Friendly Options?
- Gluten-Free: Use gluten-free flour for the cake and frosting.
- Vegan: Substitute butter, eggs, and milk with plant-based alternatives.
- Nut-Free: Ensure all ingredients are free from nuts and processed in a nut-free facility.
Conclusion: Create Your Own Fairy-Tale Moment with Sleeping Beauty Cake
The Sleeping Beauty Cake is more than just a dessert—it’s a magical experience that brings the enchantment of Disney’s classic fairy-tale to life. Whether you’re celebrating a birthday, wedding, or holiday, this cake is the perfect way to add a touch of whimsy and wonder to your event.
From its rich history and customizable designs to its delicious flavors and stunning decorations, the Sleeping Beauty Cake offers something for everyone. Whether you choose to bake it yourself or order from a professional, this cake is sure to impress your guests and create lasting memories.
So, why not channel your inner fairy godmother and create a dessert that’s truly fit for a princess? Whether you’re a Disney fan, a baking enthusiast, or simply someone who loves a good cake, the Sleeping Beauty Cake is your ticket to a magical celebration.
Call-to-Action
Have you made or ordered a Sleeping Beauty Cake? Share your creations, tips, or experiences in the comments below! We’d love to see how you brought this fairy-tale dessert to life. And if you’re planning to try it for the first time, let us know—we’re here to help you every step of the way.
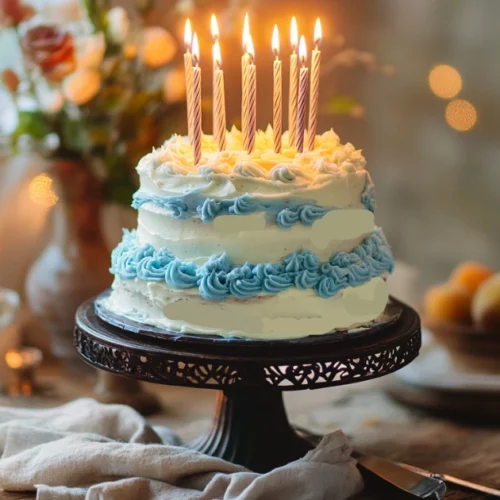
Sleeping Beauty Cake
Ingredients
For the Cake:
- 3 cups all-purpose flour
- 2 cups sugar
- 1 cup unsalted butter softened
- 4 large eggs
- 1 cup milk
- 2 tsp vanilla extract
- 1 tsp baking powder
- 1/2 tsp salt
For the Frosting:
- 2 cups unsalted butter softened
- 4 cups powdered sugar
- 2 tsp vanilla extract
- 2-3 tbsp milk or heavy cream
For Decorations:
- Fondant pink, blue, gold, and other colors
- Food coloring
- Edible glitter or gold dust
Instructions
Preheat the Oven:
- Set your oven to 350°F (175°C) and grease your cake pans.
Prepare the Batter:
- In a large bowl, cream the butter and sugar until light and fluffy.
- Add the eggs one at a time, then mix in the vanilla.
- In a separate bowl, combine the dry ingredients (flour, baking powder, salt).
- Gradually add the dry ingredients to the wet mixture, alternating with milk.
Bake:
- Pour the batter into the prepared pans and bake for 25-30 minutes, or until a toothpick inserted into the center comes out clean.
- Let the cakes cool completely before removing them from the pans.
Make the Frosting:
- In a large bowl, beat the softened butter until smooth.
- Gradually add the powdered sugar, mixing on low speed to avoid a mess.
- Once combined, add the vanilla and milk or cream.
- Beat on high speed until the frosting is light and fluffy.
Assemble the Cake:
- Level the cake layers if needed.
- Place the first layer on a cake stand or plate.
- Spread a layer of frosting on top, then add the second layer.
- Repeat until all layers are stacked.
- Apply a thin coat of frosting (crumb coat) to the entire cake and refrigerate for 15-20 minutes.
Decorate:
- Roll out fondant and create shapes like Princess Aurora, the castle, or the fairies.
- Use food coloring and edible glitter to add details.
- Carefully place the fondant pieces on the cake, using a bit of water or edible glue to secure them.
Notes
- Gluten-Free Option: Use gluten-free flour instead of all-purpose flour.
- Vegan Option: Substitute butter with vegan margarine, eggs with flax eggs, and milk with almond or soy milk.
- Storage: Store the cake in a cool, dry place. If it has perishable fillings, refrigerate it and bring it to room temperature before serving.

